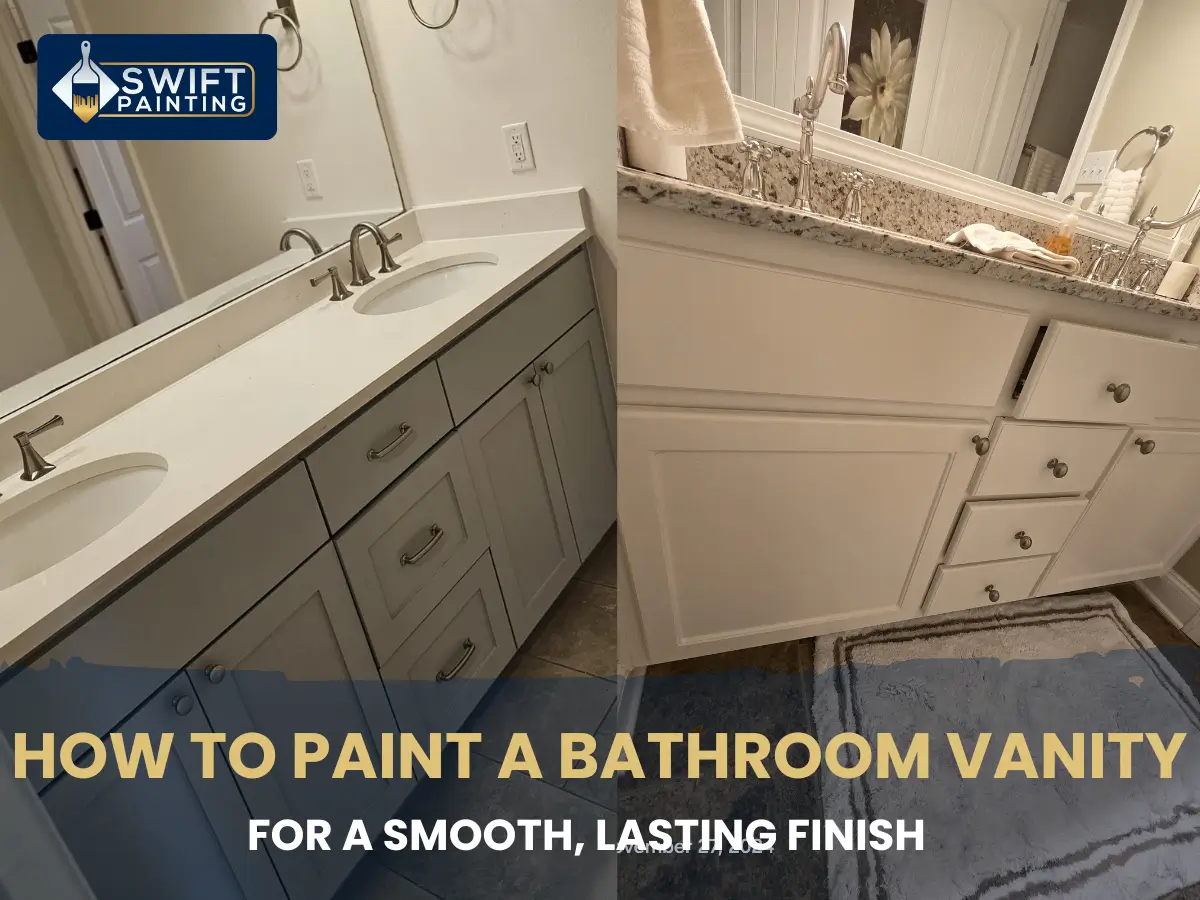
A bathroom vanity can completely change the look of your space without the cost of a full remodel. If your cabinets look worn, outdated, or damaged from years of moisture exposure, painting them is one of the most affordable ways to refresh the room. With the right preparation, primer, and paint, you can achieve a finish that looks professionally sprayed and holds up to daily use.
Many homeowners assume vanity cabinets need to be replaced when they start showing wear. In reality, a quality paint job can give existing cabinetry a second life while saving hundreds or even thousands of dollars. The key is understanding how bathroom conditions differ from other areas of the home and choosing products designed to handle humidity, splashes, and frequent cleaning.
Why Painting a Bathroom Vanity Is Worth It
Bathrooms experience constant temperature changes and moisture exposure. Over time, cabinet finishes can fade, peel, yellow, or develop small chips around handles and drawer fronts.
Repainting a vanity allows you to modernize the room without replacing countertops, plumbing fixtures, or cabinetry. It is often one of the highest-impact updates you can make in a bathroom because the vanity naturally serves as the focal point of the space.
Many homeowners choose this route when updating older oak cabinets, dark wood finishes from previous decades, or builder-grade vanities that still have good structural integrity.
According to the U.S. Environmental Protection Agency’s indoor air quality recommendations, controlling moisture and using low-VOC products can help maintain a healthier indoor environment. Choosing modern water-based cabinet paints often supports both durability and lower odor levels during renovation projects.
Before You Start: Understanding What You’re Painting
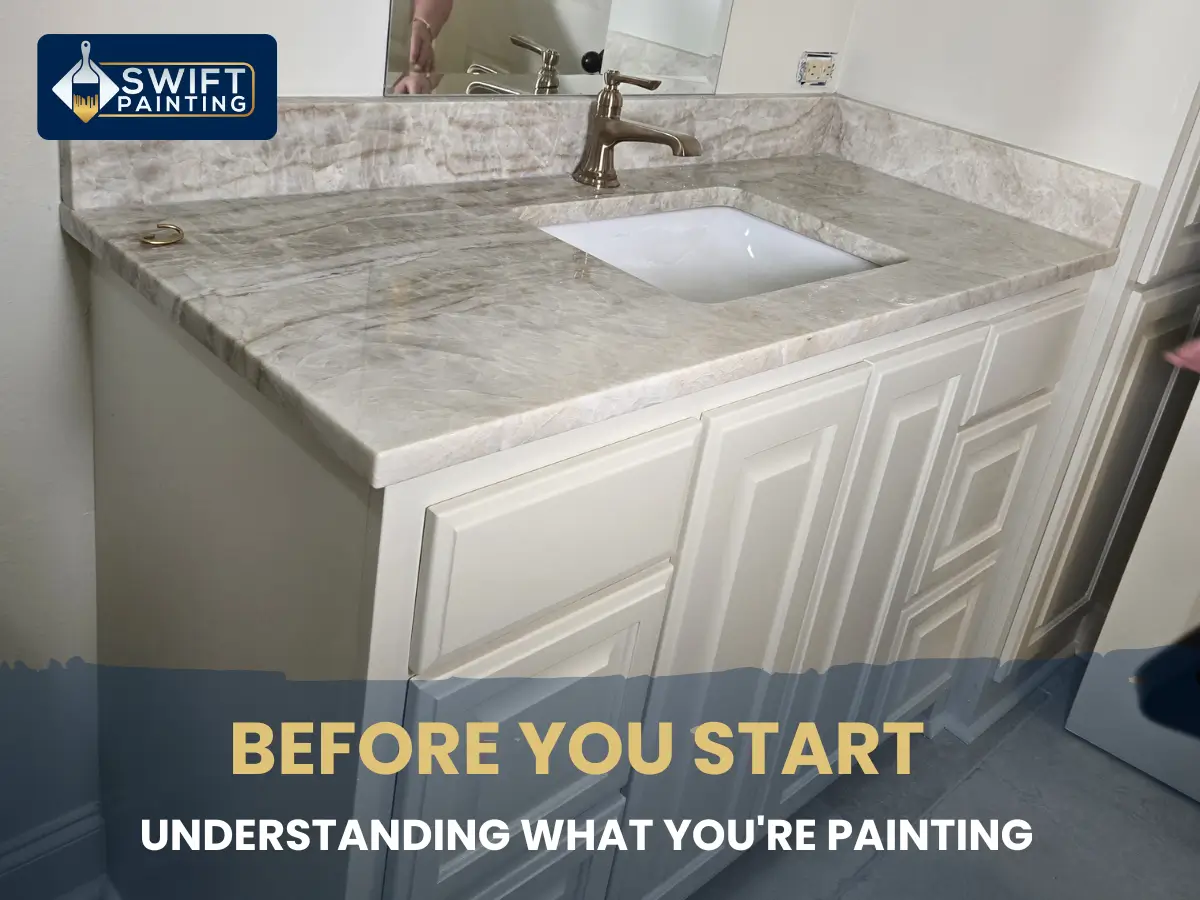
Not all bathroom cabinets are made from the same materials. Solid wood, MDF, plywood, laminate, and thermofoil surfaces each respond differently to paint.
Solid wood and MDF are generally the easiest surfaces to refinish. Laminate cabinets can also be painted successfully, but they require proper bonding primers to prevent peeling. The most common reason painted vanities fail is not the paint itself—it’s poor surface preparation.
If the existing finish is glossy, dirty, or covered in soap residue, new paint may struggle to adhere correctly.
Taking time to prep the surface properly often determines whether the finish lasts for months or for years.
Tools and Materials That Make the Biggest Difference
You do not need expensive professional equipment to get excellent results, but quality materials matter.
A high-adhesion primer, cabinet-grade enamel paint, microfiber rollers, angled brushes, painter’s tape, wood filler, and fine-grit sandpaper will handle most projects.
The best-performing vanity finishes usually come from urethane-modified enamel paints because they cure harder than standard wall paint and resist moisture more effectively. Many professionals recommend products from manufacturers such as Sherwin-Williams and Benjamin Moore because they are specifically designed for cabinets, trim, and high-touch surfaces.
Step 1: Remove Doors, Drawers, and Hardware
Start by removing cabinet doors, drawer fronts, handles, hinges, and knobs.
Taking photos before disassembly can make reinstallation much easier later. Label each door and hinge location if the vanity has multiple compartments.
Painting with everything removed allows better coverage and helps eliminate visible brush marks around hardware.
Step 2: Thoroughly Clean Every Surface
One of the most overlooked parts of painting bathroom cabinets is cleaning.
Even cabinets that appear clean often contain invisible layers of hand oils, hairspray residue, soap splatter, and dust.
Use a degreasing cleaner or TSP substitute to remove buildup. After cleaning, wipe surfaces with fresh water and allow everything to dry completely.
Skipping this step frequently leads to adhesion problems months later.
Step 3: Repair Damage and Sand the Surface
Inspect the vanity closely for dents, scratches, chips, or old hardware holes.
Fill imperfections with wood filler and allow them to dry according to manufacturer instructions. Once cured, sand the repairs smooth.
Next, lightly sand all cabinet surfaces. The goal is not to remove every layer of old finish but to create a surface that primer can grip.
Most vanity projects respond well to 220-grit sandpaper. After sanding, vacuum all dust and wipe everything with a microfiber cloth.
Step 4: Apply a Bonding Primer
Primer creates the foundation for a durable finish.
Bathrooms expose cabinetry to conditions that ordinary furniture rarely experiences. Humidity fluctuations and repeated cleaning require stronger adhesion than standard wall painting projects.
Apply a thin, even coat using a small microfiber roller for flat surfaces and a quality angled brush for corners and details.
Allow the primer to dry fully before lightly sanding again with fine-grit sandpaper. This extra sanding step helps create the smooth finish homeowners usually associate with factory-painted cabinetry. Many professionals rely on similar professional cabinet refinishing techniques to achieve long-lasting, furniture-quality results. The EPA’s guide on safer paint choices also recommends paying attention to VOC levels when selecting primers and coatings for indoor projects.
Step 5: Paint the Vanity Using Thin, Even Coats
This is where patience matters most.
Many DIY projects fail because paint is applied too heavily. Thick coats often create visible brush strokes, drips, and uneven drying.
Instead, apply multiple thin coats.
Begin with cabinet doors and drawer fronts. Use smooth strokes and maintain a wet edge as you work. A microfiber roller helps create a more uniform finish than standard rollers while reducing texture.
Allow each coat to dry fully before applying the next.
For most vanities, two coats provide excellent coverage. Dark colors transitioning to white or light shades may require a third coat.
When homeowners search for how to paint a bathroom vanity successfully, the answer is usually simple: focus more on preparation and drying time than on the actual painting.
How Long Does It Take to Paint a Bathroom Vanity?
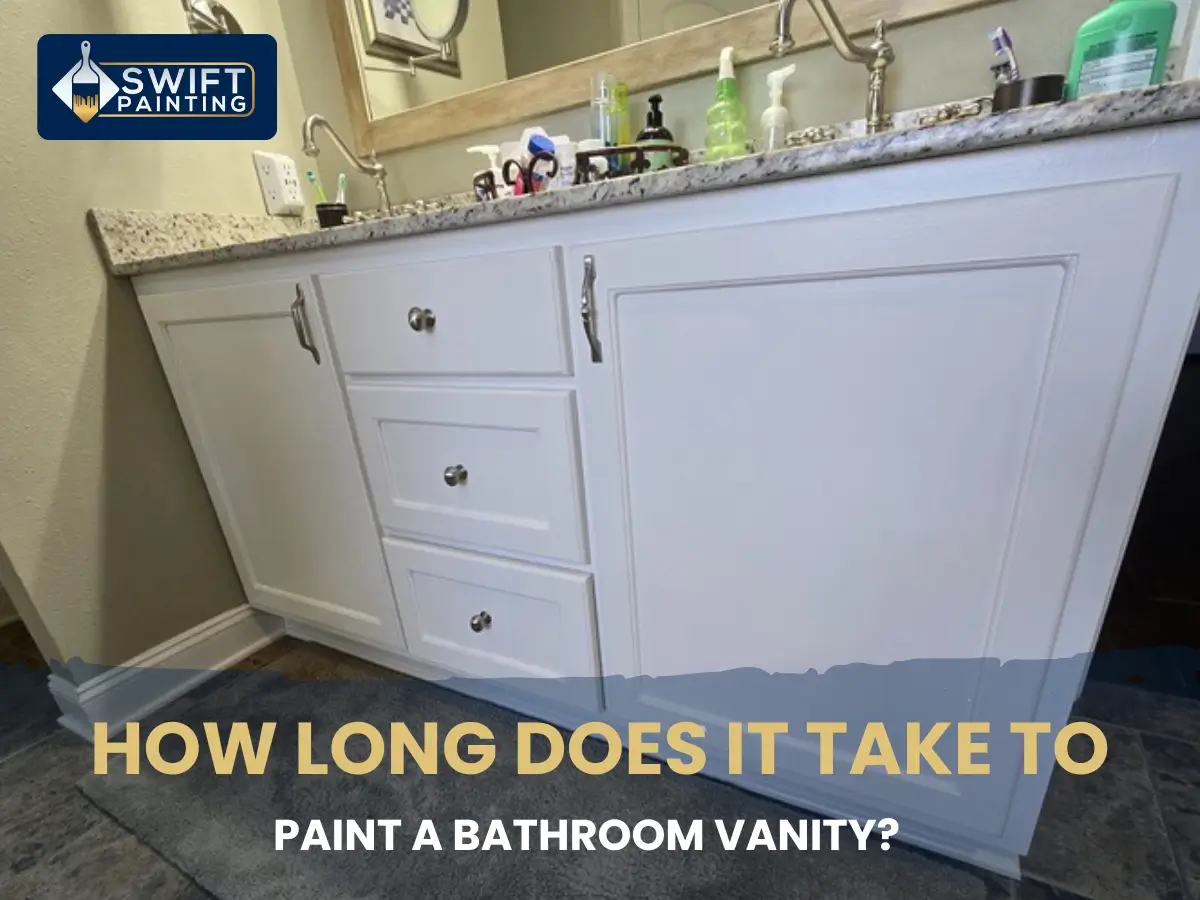
One of the most common questions homeowners ask is how long the entire process takes. While the actual painting can usually be completed within a day, drying and curing times often extend the project.
| Project Stage | Estimated Time |
| Cleaning and Prep | 2–4 Hours |
| Repairs and Sanding | 1–3 Hours |
| Primer Application | 1–2 Hours |
| Primer Dry Time | 1–4 Hours |
| Paint Application | 2–4 Hours |
| Recoat Dry Time | 2–6 Hours |
| Light Use | 24–48 Hours |
| Full Cure | 7–30 Days |
Many homeowners rush the final stages and begin using the vanity too soon. While paint may feel dry to the touch, it often needs additional time to reach maximum hardness and durability.
How Long Should You Wait Before Using Vanity?
Paint may feel dry within hours, but curing takes much longer.
Most cabinet paints require several days to develop full hardness. During this period, avoid harsh cleaning products and handle doors carefully.
Many premium cabinet enamels continue curing for up to several weeks.
Following manufacturer recommendations is one of the easiest ways to extend the life of your finish.
What Type of Paint Works Best in Bathrooms?
One of the most common questions homeowners ask is what type of paint for bathroom cabinets delivers the best long-term results.
Standard wall paint is rarely the best choice. Bathrooms expose cabinetry to moisture, cleaning products, and daily wear that ordinary painted walls don’t experience.
Waterborne alkyds and urethane enamel paints are generally considered the most durable options because they cure to a harder finish while maintaining easier cleanup and lower odor compared to traditional oil-based products.
| Paint Type | Durability | Moisture Resistance | Best For |
| Acrylic Latex | Good | Good | Budget-friendly updates |
| Waterborne Alkyd | Excellent | Excellent | Most bathroom vanities |
| Urethane Enamel | Excellent | Excellent | High-use bathrooms |
| Chalk Paint | Fair | Fair | Decorative projects with a protective topcoat |
If you’re still deciding on products, our guide on choosing the right cabinet paint can help you compare popular options based on durability, finish quality, and long-term performance.
Satin and semi-gloss finishes tend to perform best because they resist moisture better than flat finishes and are easier to clean. If you’re comparing different cabinet paint finishes, understanding sheen levels can help you choose the best option for your bathroom’s level of use.
Popular Bathroom Vanity Colors That Still Look Timeless
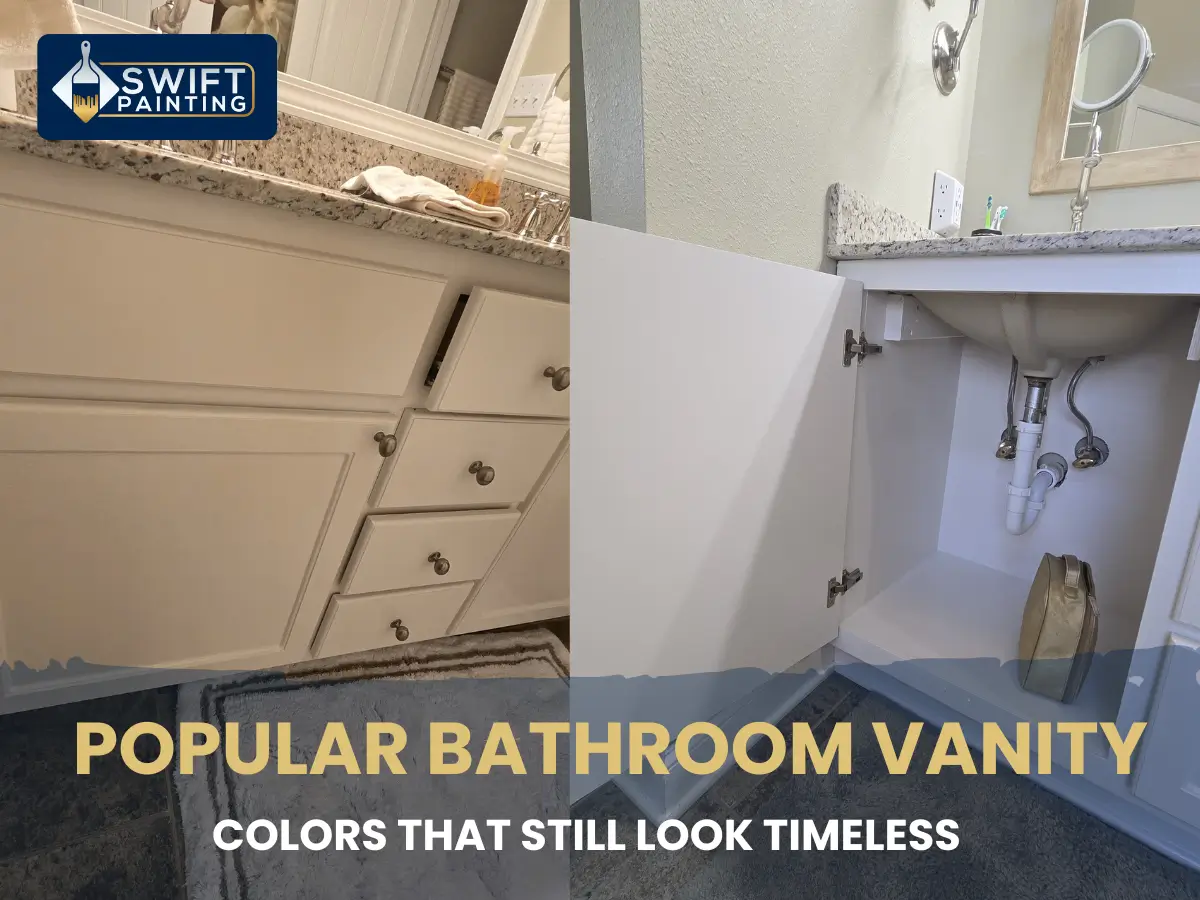
Trends come and go, but some vanity colors continue performing well year after year.
Warm whites remain popular because they brighten smaller bathrooms and pair easily with most countertop materials. Soft greige shades offer a balance between gray and beige without feeling cold.
Deep green vanities have become increasingly popular for homeowners looking to add character while maintaining a sophisticated appearance. Navy blue continues to work well in traditional and transitional spaces.
According to design experts featured by Southern Living, warmer whites and natural-toned neutrals are replacing many of the cooler gray finishes that dominated previous years.
If you’re searching for the best color to paint bathroom cabinets, focus less on trends and more on the room’s lighting, flooring, countertop color, and overall style. Looking at real-world bathroom cabinet color ideas can also help you narrow down options that complement the size and layout of your space.
Common Mistakes That Ruin Vanity Paint Jobs
The majority of failures occur long before the final coat is applied. In fact, many of the common mistakes homeowners make when painting cabinets happen during preparation rather than painting itself. Skipping cleaning, rushing sanding, applying thick coats, or using the wrong primer can significantly reduce the lifespan of the finish.
Another mistake is reinstalling hardware too early. Fresh paint can easily dent or stick if components are attached before the coating finishes curing.
Homeowners also sometimes underestimate the importance of ventilation. Proper airflow helps paint dry more evenly and reduces lingering odors.
When Should You Replace Instead of Repaint?
Not every vanity is a good candidate for refinishing.
Cabinets with severe water damage, swollen MDF, structural deterioration, or mold issues may require replacement instead.
However, if the cabinet boxes remain solid and the damage is mostly cosmetic, repainting can dramatically improve appearance at a fraction of replacement costs.
Many older vanities actually feature stronger construction than some newer budget alternatives, making refinishing an even smarter investment.
Bathroom Vanity Design Ideas That Add More Impact
Color is only part of the transformation. Replacing outdated hardware, updating mirrors, improving lighting, and installing modern faucets often creates a much bigger visual improvement than paint alone.
Many successful bathroom updates combine repainting bathroom vanity projects with new cabinet pulls and warmer lighting temperatures. This combination can make the space feel newer without requiring major renovation work.
For homeowners exploring painting bathroom vanity ideas, pairing a painted vanity with updated accessories often creates the most balanced result.
Is DIY Always the Best Option?
Painting a bathroom vanity is a project many homeowners can successfully complete, especially when the cabinetry is in good condition and proper preparation is followed. However, larger vanities, damaged surfaces, intricate trim details, or projects requiring a factory-smooth finish may benefit from professional refinishing.
The biggest advantage of hiring experienced painters is often the quality of the preparation work. Surface repairs, product selection, and application techniques can significantly affect how the finish looks and performs over time.
For homeowners who want professional-grade results without replacing their cabinets, refinishing remains one of the most cost-effective bathroom upgrades available.
Final Thoughts
A successful vanity makeover depends far more on preparation than on painting itself. Cleaning thoroughly, using the right primer, applying thin coats, and allowing proper cure time are what separate professional-looking results from projects that start peeling after a few months.
Whether you’re updating an older cabinet, planning a complete bathroom refresh, or simply exploring a DIY paint bathroom vanity project to save money, taking the time to do each step correctly will pay off in durability and appearance.
At Swift Painting LLC, we’ve seen how a properly painted vanity can completely transform a bathroom without the expense of a full renovation. When the right products and preparation methods are used, the finish can remain beautiful and durable for years. If you’re considering repainting vanity cabinets as part of a larger home improvement project, focusing on quality materials and proven techniques will always deliver the best results.
Frequently Asked Questions
Can I paint a bathroom vanity without sanding?
Light sanding is strongly recommended because it helps primer and paint bond properly. While some bonding primers advertise no-sand applications, lightly scuffing the surface generally improves durability.
How much does it cost to repaint a bathroom vanity?
Most DIY vanity painting projects cost significantly less than replacement. Material costs usually depend on primer, paint quality, tools, and whether new hardware is installed.
Is repainting bathroom vanity cabinets a good alternative to replacement?
Yes. If the cabinet structure is still in good condition, painting can dramatically improve appearance while saving money compared to a full replacement.
How many coats of paint should a bathroom vanity have?
Most projects require two coats of cabinet-grade paint after primer. Dark colors transitioning to lighter finishes may require a third coat for complete coverage.
Can I use regular wall paint on bathroom cabinets?
Regular wall paint is not recommended. Cabinet-grade enamel paints provide better durability, moisture resistance, and cleanability.
How long does painted vanity cabinetry last?
A properly prepared and painted vanity can last many years before needing touch-ups. Durability depends heavily on surface preparation, paint quality, and everyday maintenance.
What is the best finish for bathroom vanity paint?
Satin and semi-gloss finishes are usually preferred because they resist moisture, clean easily, and hold up well in high-use bathrooms.